Feeds configuration tool
We have developed a tool within our application that enables you to create, configure, and monitor your feeds. The tool features a sophisticated user interface that assists and guides you through the process of making changes and provides you with a clear indication of whether or not your data ingestion is successful.
The user interface allows you to manually trigger your feeds, or schedule them and track their progress.
To access the Feeds configuration tool, simply navigate to "Configuration" > "Data Setup" > "Feeds" in the application menu bar.

Feeds Overview

Notice about "Managed feeds": Please note that some of the feeds that were set up by Hello Retail during your onboarding before the current Feeds tool was published are considered legacy feeds from the previous system. These feeds are managed differently and can only be edited by Hello Retail employees, much like some of you have previously known. However, you can still use functionality such as manually putting them on queue, archiving and restoring the feed, following the process, and inspecting the feed run history.
We are currently exploring ways to convert these legacy feeds to be fully available in the current and new Feeds tool so that you can have all the functionality for them.

Creating a feed
To create a feed, access the Feeds tool in the menu bar. Once there, you will be presented with an overview of your feeds across the different types we support; Product feeds, Order feeds, Content feeds, and Permission feeds.
To initiate the process of creating a new feed, locate the feed table of your desired type and click the "Add new" button. This will take you to the next step, where you will need to select the appropriate feed connector type.

The creation procedure then varies from feed type (Products, Orders, Contents, Permissions) and feed connector type. Some of the feed types and connector types will be documented here in combinations, so you can look for one that fits you or get inspiration from one of these. You can also go and venture into creating a new feed and let the creation process guide you.
Adding a request header to a feed
Adding a request header to your feed is mainly done for authentication purposes, but it can alsl be used to specify user agents or content types.
To add a request header, first navigate to the Feeds tool in the menu bar. Here, you will see an overview of your feeds, including the different feed types we support, such as Product feeds, Order feeds, Content feeds, and Permission feeds.
Next, find the table for the desired feed type and click on the feed you want to add the header to. This will take you to the feed edit view.

At the top of the view, you will see several tabs - make sure you are in the "Requesting" tab.
Here, you can click either the Add header or the Add Basic Auth helper button. Now you should have input fields to insert and save your header.

Once you are done, click the "Save" button at the bottom of the page to apply the changes.

Naming a feed
Assigning a name to your feeds can make them more easily identifiable than their URLs. This can help you and your colleagues better understand the context of each feed.
To assign it a name, first navigate to the Feeds tool in the menu bar. Here, you will see an overview of your feeds, including the different feed types we support, such as Product feeds, Order feeds, Content feeds, and Permission feeds.
Next, find the table for the desired feed type and click on the name of the feed you want to assign a new name. This will take you to the feed edit view.
At the top of the view, you will see several tabs. Click on the "Settings" tab to access the settings edit view.
Here, you can enter a name for your feed in the "Name" input field.

Once you are satisfied with the name, click the "Save" button at the bottom of the page to apply the changes.
Allowing a feed only to update data
Please read the section about "Synchronization: create, update, delete" to better understand what behavior feed permissions apply.
Per definition, all feeds can update data. Then, if configured, some feeds can create data and/or delete data.
To see how a particular feed's permissions are configured, first navigate to the Feeds tool in the menu bar. Here, you will see an overview of your feeds, including the different feed types we support such as Product feeds, Order feeds, Content feeds, and Permission feeds.
Next, find the table for the desired feed type and click on the name of the feed you want to schedule. This will take you to the feed edit view.
At the top of the view, you will see several tabs.
Click on the "Settings" tab to access the settings edit view.

You will see a view of the general settings for this particular feed. Among others, there are toggles to allow the feed to be created and deleted.
A feed that only updates data will have to create and delete permissions toggled off as such:

If your feed does not look like the above picture, where create and delete permissions are toggled off, then switch them off, and click the "Save" button at the bottom of the page to apply the changes.
Allowing a feed to create data
Please read the section about "Synchronization: create, update, delete" to better understand what behavior feed permissions apply.
To alter the permission of a feed and allow it to create data (be it products, order, content, or permissions), first navigate to the Feeds tool in the menu bar. Here, you will see an overview of your feeds, including the different feed types we support such as Product feeds, Order feeds, Content feeds, and Permission feeds.
Next, find the table for the desired feed type and click on the name of the feed you want to schedule. This will take you to the feed edit view.
At the top of the view, you will see several tabs.
Click on the "Settings" tab to access the settings edit view.
You will see a view of the general settings for this particular feed. Among others, there are toggles to allow the feed to be created and deleted.
Remember: All feeds have per definition the permission to update existing data, so there will not be a toggle for this kind of permission.

You can toggle the permissions on or off depending on your desired behavior of the feed.

Once you are satisfied with the permission settings, click the "Save" button at the bottom of the page to apply the changes.
Allowing a feed to delete data
Please read the section about "Synchronization: create, update, delete" to better understand what behavior feed permissions apply.
To alter the permission of a feed and allow it to delete data (be it products, orders, content, or permissions), first navigate to the Feeds tool in the menu bar. Here, you will see an overview of your feeds, including the different feed types we support such as Product feeds, Order feeds, Content feeds, and Permission feeds.
Next, find the table for the desired feed type and click on the name of the feed you want to schedule. This will take you to the feed edit view.
At the top of the view, you will see several tabs.
Click on the "Settings" tab to access the settings edit view.
You will see a view of the general settings for this particular feed. Among others, there are toggles to allow the feed to be created and deleted.
Remember: All feeds have per definition the permission to update existing data, so there will not be a toggle for this kind of permission.
You can toggle the permissions on or off depending on your desired behavior of the feed.
Once you are satisfied with the permission settings, click the "Save" button at the bottom of the page to apply the changes.
Automatic schedule a feed
To set up automatic scheduling for a feed, first navigate to the Feeds tool in the menu bar. Here, you will see an overview of your feeds, including the different feed types we support such as Product feeds, Order feeds, Content feeds, and Permission feeds.
Next, find the table for the desired feed type and click on the name of the feed you want to schedule. This will take you to the feed edit view.
At the top of the view, you will see several tabs.
Click on the "Settings" tab to access the settings edit view.
Here, you can toggle "on" the "Active" switch to turn on the schedule for the feed.
You can then select additional scheduling interval options.

Once you are satisfied with the scheduling options, click the "Save" button at the bottom of the page to apply the changes.
Archiving a feed
To archive a feed, go to the Feeds tool in the menu bar where you can see an overview of your feeds categorized by type: Product feeds, Order feeds, Content feeds, Permission feeds.
Locate the table of the feed you want to archive and click on the "..." button on the same row.

This will open a menu where you can select the "Archive" sub-menu button.

When you archive a feed, it will be removed from the feed table and any automatic scheduling of feed runs will stop.
Feed runs that are currently processing will continue until completion and will not be interrupted. However, any queued feed runs that haven't been picked up for processing will be canceled once the system detects that the feed has been archived.
Archiving a feed doesn't permanently delete it, so you can always restore it. To restore an archived feed, please refer to the documentation on "Restoring an archived feed".
Restoring an archived feed
To restore an archived feed, first navigate to the Feeds tool in the menu bar where you can view an overview of the different feed types that are supported: Product feeds, Order feeds, Content feeds, Permission feeds.
Next, click on the "Archive" tab located at the top of the view, which is next to the currently selected "Overview" tab. This will show you a similar view of tables but with all archived feeds.
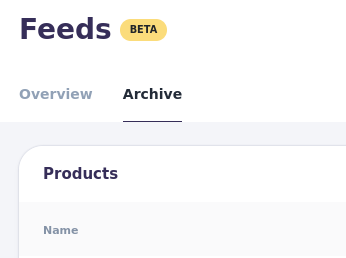
[Picture of the "Overview" and "Archive" tab in view Feeds Overview]
Find the table of your desired feed type and locate the feed you want to restore.
Then, click the right button "..." on the same row and a menu bar will appear.

From here, select the "Unarchive" option and the feed will disappear from the current view.
To find the restored feed, return to the top and click on the "Overview" tab. The default view will show again and you can now locate your restored feed.
Please note: If the restored feed previously had an active schedule, the schedule will now be on pause. To restart the schedule, toggle the switch located on the left of the feed in the table. (This is a safeguard to prevent the restored feed from automatically restarting its schedule and possibly making modifications to your data in our system).

Manually run a feed
To manually run a feed, first navigate to the Feeds tool in the menu bar where you can view an overview of the different feed types that are supported: Product feeds, Order feeds, Content feeds, Permission feeds.
Once you have found the table of your desired feed type:
Click on the green button "Put on queue" on the same row of the feed you want to run.

The row will then update, and the button will change its color and text to "Awaiting queue".

After a short period, the text will change to "Downloading" when the feed queue ticket is picked up for processing.

Once the downloading is complete, the text will change to "Parsing".

Finally, when parsing is done, the button's color will revert, and the text will display "Put on queue" again.
Tip: If the button is either "Awaiting queue", "Downloading", or "Parsing", you can re-click the button to access the feed run view, where you can track its progress.
Interrupting a running feed
If one of your feeds is running and you need to stop it, you can interrupt the processing. This can be helpful when you want it to stop quickly, such as when you need to re-queue it due to a configuration change.
When you interrupt a feed, the system will try to stop the processing as quickly as possible. The system has built-in interruption checkpoints that will make the processing stop at controlled places.
Please note: Depending on how far the system has processed the feed, the processing may finish, but this is usually not the case.
If you need to interrupt a running feed, start by navigating to the Feeds tool in the menu bar.
From there, you'll see an overview of your feeds, organized by type, including Product feeds, Order feeds, Content feeds, and Permission feeds.
Look for the table of the feed type that you need to interrupt, and locate the feed that is currently running.
You can tell if a feed is running if there is a gray button to the right of the feed name in the table that says "Awaiting queue," "Downloading," or "Parsing".
To interrupt the running feed, click on the gray button with either "Awaiting queue," "Downloading," or "Parsing".
You will be taken to the Feed Run Details view.

From there, you can use the interface to interrupt the feed run.

For more information on the Feed Run Details view, please read section "Feed Run Details" section.
Note: If the button is green and says "Put on queue," then the feed is not currently running, and there is no feed run to interrupt.